Invalid Ip Address Please Enter It Again Netgear
Ethernet doesn't have a valid IP Configuration is caused when your NIC (Network Interface Card) hooked up to your Router or Modem via the Ethernet Cable is unable to get a VALID IP Accost (Internet Protocol). This is needed for the reckoner to speak to the router, and function on the net. In that location are three main causes for this issue to occur, the first one is a faulty router, the second one is an incorrectly assigned IP Address to the estimator, and the third one is the faulty NIC. We volition address the issue in three steps, and they must exist followed in the sequence listed.
Ethernet doesn't have a valid IP Configuration
Repair Decadent Files
Download and run Restoro to scan and restore corrupt and missing files fromhere. In one case done, proceed with the solutions below.
Power-Bicycle your Reckoner
There is a characteristic called Fast Startup which is designed to load settings from systems memory or cache to reduce kicking and starting time-upwardly time. Many users reported that this effect is fixed when the system is restarted and fast startup is disabled.
Disabling Fast Startup is undoubtedly the most effective solution capable of fixing this issue, although it results in the loss of the Fast Startup feature altogether. To disable Fast Startup, y'all need to:
- Right-click on the Start Menu button to open the WinX Menu.
- Click on Power Options in the WinX Card.
- Click on Choose what the ability buttons do / Choose what the ability button does in the left pane.
- Click on Change settings that are currently unavailable.
- Near the lesser of the window, uncheck the checkbox beside Plow on fast startup (recommended) to disable Fast Startup.
- Click on Save changes.
- Shut the System Settings
- Restart your computer.
Check Your NIC (Network Adapter Settings)
The router usually assigns the IP Address Automatically and this should exist the preferred setting unless y'all've manually chosen to specify IP Address. If that is the example, then yous should still set it to automatic commencement, one time it is connected, check the Internet Properties for the correct settings and re-configure it manually.
The educational activity beneath will work on Windows Vista/XP/vii/8 and 10.
To begin, Concord the Windows Key and Press R. Typencpa.cpland Click OK. In the Network Connections window, right-click your Network Adapter and choose Properties.
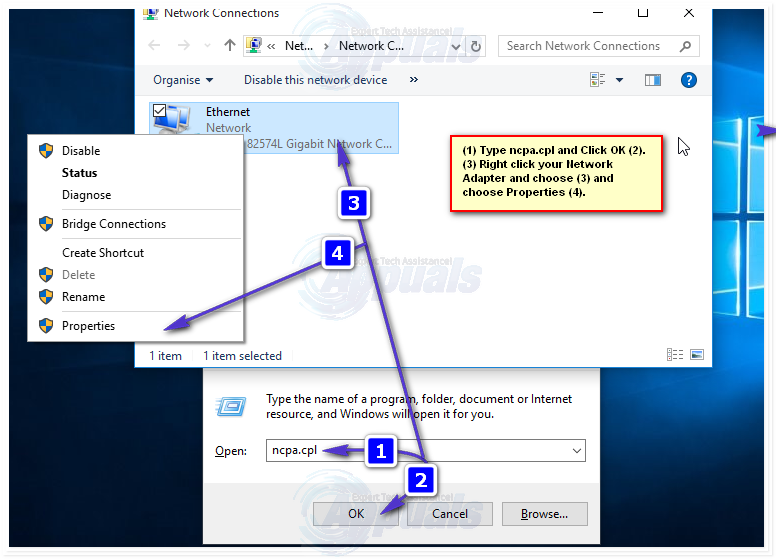
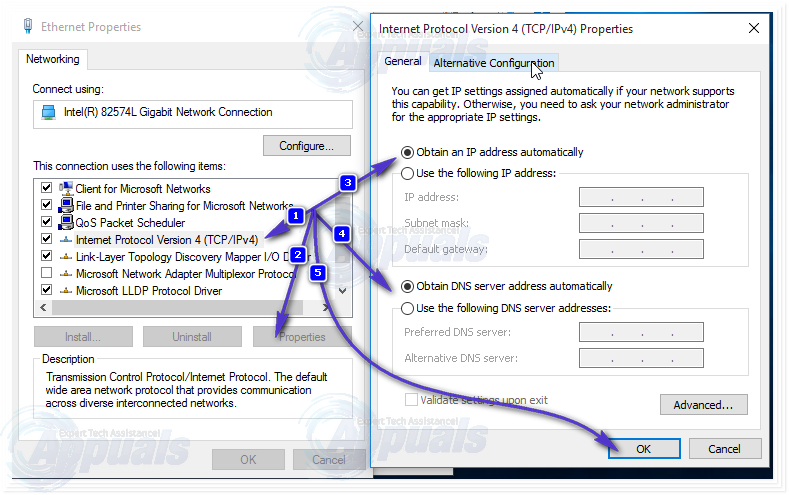
From the Ethernet Properties window, click one to highlightInternet Protocol Version 4 (TCP/IPv4)and and so click on Properties. The next window volition open up up theInternet Protocol Version 4 (TCP/IPv4) Properties,from here make certain that the following two settings are selected.
- Obtain an IP Address Automatically
- Obtain DNS Server Address Automatically
This should do for the Ethernet Carte du jour. Motility to the next stage of rebooting the router.
Reboot Your Router / Modem and Check Ethernet Cable
Power of your router, and the modem or if information technology is merely the router then power the router off else both. Wait for 5 minutes so turn the router back on. Later on it has been turned on, check your PC if it at present has a valid configuration, y'all may demand to wait a few minutes. Once this is done, examination to meet if information technology now works and has the correct configuration. If it all the same won't work, then try using a dissimilar Ethernet cable from your Router to the Estimator. If it still won't piece of work, and so endeavor connecting your computer to a different router, if information technology still has the aforementioned issue with the other router the network bill of fare volition need to exist replaced, if it does connect and so the router will demand to be replaced. Before you lot replace it, attempt doing a factory restore (check the manufacturer's guide for manufacturing plant reset instructions for your router).
Reset your Network Settings
Another matter which you tin try is resetting your net settings. At that place are several cases when the network settings either become outdated or conflict with the existing network. By flushing the DNS server and resetting the socket, we can reinitialize the connection procedure in hopes that this will solve the consequence.
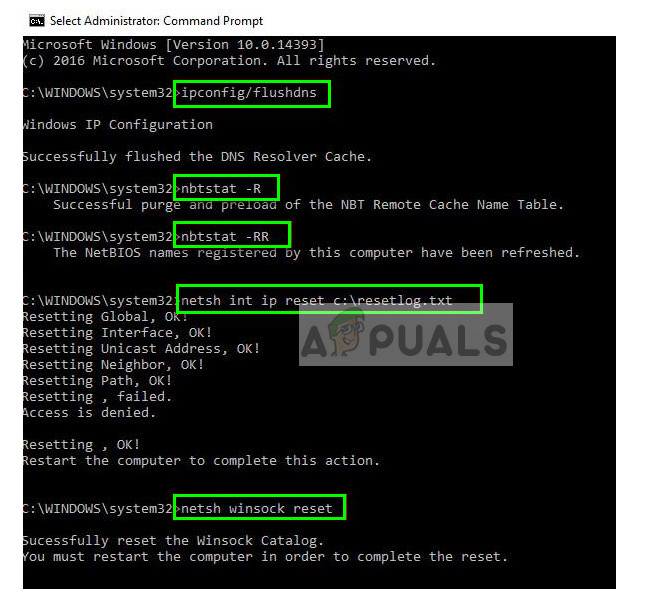
- Press Windows + S, blazon "command prompt" in the dialogue box and press Enter.
- Once in the command prompt, execute the following instructions one past one:
ipconfig /flushdns ipconfig /renew nbtstat –R nbtstat –RR netsh int ip reset c:\resetlog.txt netsh winsock reset
- Afterward resetting your settings, restart your computer properly. After restarting, press Windows + R, blazon "control console" in the dialogue box, and press Enter.
- At present select Network and sharing center and click on Change adapter settings present at the left side of the screen.
- Right-click on your Ethernet hardware and select Disable. Subsequently disabling, right-click it again and printing Enable.
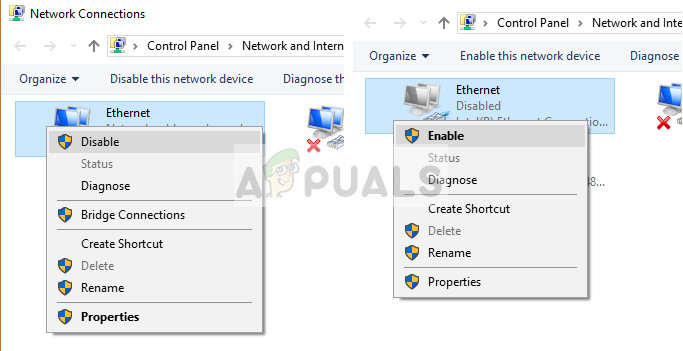
- Restart your computer again and meet if the problem persists.
Note: You tin too switch the TP connected to the router and the PA511 to your computer.
Check the Connected Cables
If you lot have performed all the steps mentioned above, you should make certain that all the cables are connected properly non only with your PC but as well in all router/switch locations. There have been several feedback from users who reported that the cables were not connected properly.
You lot should hear a 'click' sound on your device whenever y'all plug an Ethernet cable. After that, the immediate blinking on the device volition signify that the cable is correctly connected. This is non only limited to the cable architecture in your home merely also the main cable connecting your dwelling to the internet (normally installed by the ISP).
Another important diagnostic you can make is that if other devices are non able to connect to the internet too, it is more the indication that something is non wrong with your estimator.
Uninstall and Reinstall your Network Adapter
- Agree the Windows Fundamental and Press X. Typehdwwiz.cpland ClickOK.
- Expand, Network Adapters. Note downwardly the name of your network card.
- Right-click on your ethernet card (nic) and choose Uninstall.
- Click Action -> Scan for hardware changes from the top card.
Disable IPV6
Mostly, the computer is configured to employ the IPV4 connexion type. Nevertheless, it is possible that the network settings were reconfigured automatically to run on the IPV6 configuration. This can crusade a disharmonize with the connection and prevent the Ethernet connection from working properly. Therefore, in this pace, we will be disabling the IPV6 connection. For that:
- Right–click on the network icon in the arrangement tray.
- Select the "Open Network and Internet Settings" option.

Correct-clicking on the network icon and selecting the "Network & Internet Settings" option - Click on the "Network and Sharing Centre" choice and and so select the "Change Adapter Settings" button.

Clicking on the "Network and Sharing Center" selection - Correct–click on the network connection that you are using and click on the properties selection.

Right-clicking on the "Network Connection" and select properties - Locate "Cyberspace Protocol Version 6 (TCP/IP)" from the list and uncheck information technology.

Unchecking the IPV6 option from the list - Click on "OK" to apply your settings and check to meet if the consequence persists.
Disable Microsoft Kernel Debug Network Adapter
If a sure Network adapter has been installed on your device in addition to the default network adapter they tin can interfere with each other and foreclose the Ethernet connectedness from working properly. In some cases, the Microsoft Kernel Debug Network Adapter manifests itself on your computer and prevents the default drivers from working properly. Therefore, in this step, we will exist disabling the Network Adapter completely. To do that:
- Press the "Windows" + "Ten" Key simultaneously.
- Select "Device Manager" from the list of available options.

Clicking on "Device Manager" - When the device manager opens, select the "View" selection and check the "Show Hidden Devices" choice.
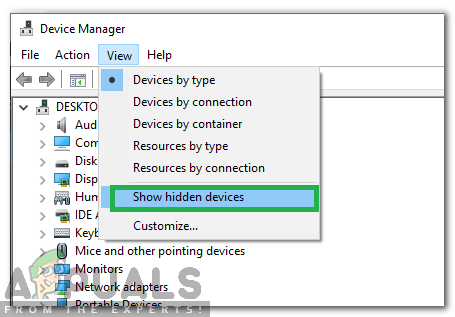
Clicking on the "Testify Subconscious Devices" selection - Right–click on the "Microsoft Kernel Debug Network Adapter" and select the "Disable" selection.

Correct-clicking on the "Microsoft Adapter" and selecting Disable - Click on "yeah" in the confirmation option that appears.
Assign a MAC Address to the Network Card
The MAC Accost needs to be assigned to the network bill of fare to establish a connection with the cyberspace router. If the MAC Accost isn't entered properly it can foreclose the device from connecting through the ethernet. Therefore, in this pace, we volition exist manually assigning the network menu a MAC Address. To practise that:
- Press the "Windows" + "R" keys simultaneously.
- Type in "cmd" in the dialogue box and printing "Enter".
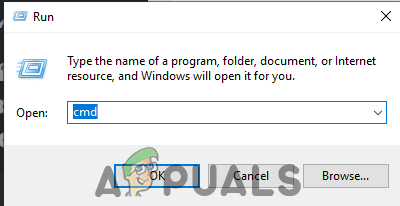
Typing in "cmd" - Type in "ipconfig/all" and press "Enter".
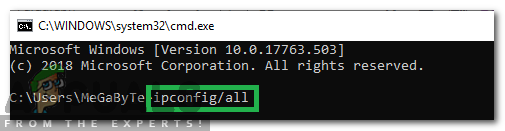
Typing in "ipconfig/all" - Annotation downwards the "Physical Accost" mentioned in the details that announced.

Noting downwardly the "Physical Address" - Right–click on the network icon in the organization tray.
- Select the "Open Network and Net Settings" option.
Correct-clicking on the network icon and selecting the "Network & Internet Settings" option - Click on the "Network and Sharing Centre" option and then select the "Change Adapter Settings" button.
Clicking on the "Network and Sharing Center" selection - Right–click on the network connection that you are using and click on the "properties" option.
Right-clicking on the "Network Connection" and select properties - Click on the "Configure" push button and click on the "Advanced" tab.

Clicking on the "Configure" pick - Click on the "Network Address" selection from the listing and check the "Value" option.
- Enter the accost that you noted downwards in the "fourth" pace of this solution.
- Click on "OK" to relieve your changes and check to run across if the issue persists.
Enable DHCP
DHCP Automatically detects and assigns the network configuration settings on your computer. Therefore, if it is disabled the network configurations might not be applied properly which tin trigger the error. In this step, we will be enabling the DHCP selection on your computer. For that:
- Press the "Windows" + "R" keys simultaneously to open upwardly the RUN prompt.
- Type in "services.msc" and printing "Enter".

Typing in "Services.msc" - In the Services WIndow, double-click on the "DHCP Client".
- Click on the Startup blazon dropdown and select "Automatic" from the list of options.

Selecting "Automatic" in the Startup type - Click on the "Beginning" option to trigger the service.

Clicking on "Start" to beginning the service - Now navigate dorsum and "Right–click" on the "DHCP Client" choice.
- Select the "Restart-Service" option and select "yep" in the confirmation box.

Restarting the service
Disable the Ability Management Customizations
In some computers, there are special power-saving features that often disable sure functions to conserve energy. If the power-saving feature for the network adapter is enabled it may exist preventing the network adapter from functioning properly. Therefore, in this stride, we will be disabling the Power Saving feature on the Network Adapter. For that:
- Right–click on the network icon in the system tray.
- Select the "Open Network and Internet Settings" option.
Correct-clicking on the network icon and selecting the "Network & Internet Settings" pick - Click on the "Network and Sharing Middle" option and then select the "Change Adapter Settings" button.
Clicking on the "Network and Sharing Center" option - Right–click on your internet connection and select the "Disable" option.
- Over again, right–click on information technology and select "Properties".
Right-clicking on the "Network Connection" and select properties - Click on the "Configure" option.
Clicking on the "Configure" option - Click on the "Power Management" tab and uncheck the "Allow the computer to turn off this device to salve power"selection.

Clicking on the "Power Direction" tab - Click on "OK" to apply your changes.
- Right–click on the internet connection again and select "Enable".
- Cheque to see if the issue persists.
Renew your IP Configurations
Sometimes, the IP Configurations might be preventing the Ethernet from connecting properly. Therefore, in this step, nosotros volition be reinitializing the IP configurations. For that:
- Press the "Windows" + "R" buttons simultaneously to open upwards the RUN prompt.
- Type in "cmd" and printing "Enter".
Typing in "cmd" - Blazon in the post-obit commands 1 by one and press "Enter".
IPconfig /release IPconfig /flushdns IPconfig /renew
- Check to encounter if the issue persists.
Disable your Antivirus
If there is a 3rd-Political party Antivirus installed on your organisation it is recommended to temporarily disable it and bank check to see if the upshot persists. If the issue goes away afterwards disabling the Antivirus it ways that the Antivirus was blocking the computer from making contact with the internet.
- Right–click on the "Antivirus" icon in the system tray.
- In most antivirus software there is an option to disable the antivirus from in that location
- If no pick is bachelor, search the web for the directions to disable your antivirus
Perform a Bank check Disk Scan
Sometimes, if certain areas of the Hd are corrupted they might interfere with certain elements of the operating system. They can also interfere with the Ethernet Drivers and prevent them from performance properly. Therefore, in this footstep, we will exist performing a check disk scan to place and fix bad sectors of the hard drive. For that:
- Press the "Windows" + "R" keys simultaneously.
- Type in "cmd" in the dialogue box and printing "Enter".
Typing in "cmd" - Type in "chkdskc: /f" and printing "Enter" to initiate it.
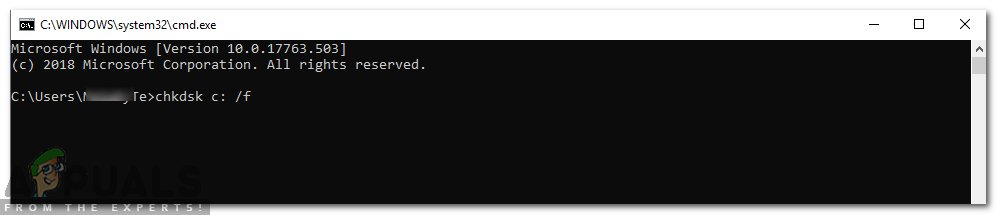
Initiating the Disc check - Press "Y" to confirm the scheduling of a disk check scan.
- Wait for the Disk Cheque scan to complete and bank check to run into if the issue persists.
Set IP and DNS Manually
If obtaining the IP address and DNS automatically doesn't fix the problem, you might want to consider setting both your IP address and DNS manually. Co-ordinate to users, it's non mandatory to change both IP address and DNS, but if setting the IP address manually doesn't assistance, be certain to change your DNS every bit well. To do that, follow these steps:
- Printing "Windows' + "R" to open up the Run prompt.
- Type in "Ncpa.cpl" and press "Enter' to open the network management window.

Opening network settings in Control Panel - Inside the network management window, right-click on the Network connexion that you are using and select the "Backdrop" option.
- Within the connection properties, select "Internet Protocol Version 4 (TCP/IPv4)" and click on "Properties".
- Select "Use the following IP address" If the router's LAN IP address is 192.168.1.1, please type in IP address 192.168.i.x (x is from 2 to 253), subnet mask 255.255.255.0, and default gateway 192.168.1.one.
Note:Your IP Addresses might differ slightly and then brand certain to connect some other computer to the network and check its connectedness status to obtain the verbal information regarding this.
Open Properties of IPV4 - Select the "Utilise the following DNS server addresses" pick and then type the DNS server IP accost, which should exist provided by your ISP.
Note:As an alternative, endeavor to type in 1.1.ane.ane and 1.0.0.1 as the first and the secondary DNS addresses. - Click on "Apply" to salvage your settings and so on "OK" to close out of the Window.
- Check to see if doing so has fixed your upshot.
Note: In most cases, blazon your local area DNS server IP addresses into it. The Preferred DNS server is the same as the default gateway. For the Secondary DNS server, yous could go out it blank or blazon in 8.8.8.8.
Disable IPv6 Using Registry Editor
In some cases, the IPV6 setting might not exist properly disabled from the settings menu. Therefore, in this footstep, we will exist disabling it from the registry editor. To exercise so, you will require an business relationship that has administrator admission and tin access the registry, keep in mind that some versions of Windows don't take the registry editor enabled then you might not be able to admission information technology on your computer. Regardless of that, to execute this step:
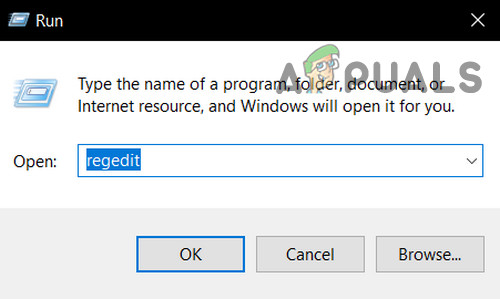
- Press "Windows Fundamental + R" and type in "regedit" and then printing "Enter" to launch the registry editor.
Open Regedit - Inside the registry editor, navigate to the post-obit location.
HKEY_LOCAL_MACHINE\SYSTEM\CurrentControlSet\Services\TcpIP6\Parameters.
- After navigating to the binder, correct-click the empty space in the right pane and choose the "New > DWORD (32-flake) Value" option.
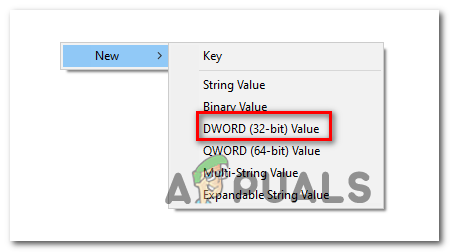
Creating a New Dword (32-bit) value - Type in "Disabled Components" as the name of the new value and salve information technology.
- Double click DisabledComponents to open its properties and prepare value data to "ffffffff" and click "OK" to salve changes.
- After making this registry, you should exist disabling the IPV6 setting on your estimator entirely, keep in listen that you can get rid of this key anytime and that should become this characteristic enabled again.
- Restart your computer and check to run into if making the registry fixes the upshot.
Install Network Driver In Compatibility Fashion
In some cases, you lot might be getting this issue because the commuter that you are trying to or take already installed on your figurer isn't fully supported by your operating organisation or any other hardware that has been installed on your computer. This is a very mutual scenario and due to this Windows has a Compatibility mode feature.
Basically, the compatibility mode allows the user to exist able to run certain programs in accord with the architecture of the older Windows Operating systems and information technology sometimes gets the drivers working on your calculator. Therefore, in this step, we will be installing these drivers in compatibility manner.
- Navigate to your manufacturer's website and download the Ethernet Driver's setup file for your reckoner.
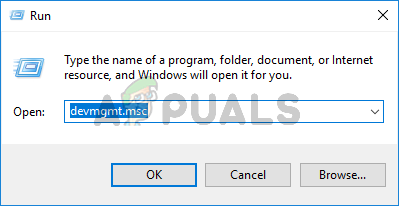
- Printing the "Windows" + "R' keys to open the Run prompt and type in "devmgmt.msc" and and then press "Enter" to launch the device managing director.
Type devmgmt.msc and Press Enter to Open up Device Manager - In the device management window, expand the "Network Adapters" pick and then right-click on the commuter that your computer is currently using.
- Click on the "Uninstall Device" push button and then a new window should pop up on your screen asking you to ostend your actions.
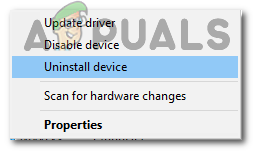
Clicking on the "Uninstall Device" choice - Confirm that you lot want to delete the driver and follow through with the on-screen instructions to completely remove it from your figurer.
- Go to the location where yous had saved your downloaded setup files of the drivers and right-click, then select "Properties".
- Select the Compatibility Tab and place a checkmark next to "Run this program in Compatibility style" and select an older version of the operating arrangement.
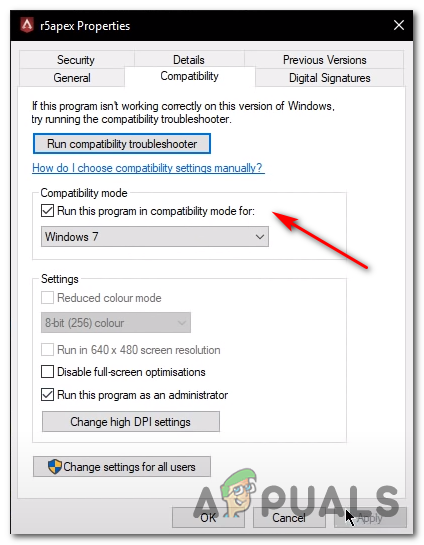
Running the r5apex.exe executable in Compatibility Mode with Windows 7. - Wait for the driver to be installed on your reckoner and bank check to see if the upshot persists.
Irresolute your Power Programme to Maximum Performance
In some cases, the wireless adapter installed on your computer might not be the virtually efficient one and due to that, y'all might be getting this mistake message on your screen while trying to connect to an ethernet connectedness. Basically, in some cases, the computer is configured from the power management window to prevent high power usage hardware from working when the figurer is idle.
Notwithstanding, this feature doesn't ever piece of work flawlessly because there accept been many instances where the feature malfunctions and prevents you lot from using the ethernet connexion entirely. Therefore, in this pace, nosotros will be disabling it completely from the Control Panel. To do that, follow the steps below.
- Press "Windows" + "R' to open the Run prompt.
- Type in "command panel" and printing "Enter" to open the classical control panel interface.
Accessing the Classic Command Panel interface - In the control panel, click on the "View Past:" choice and select the "Large Icons" from the list.

Viewing Command Panel using Large Icons - Afterwards selecting large icons, click on the "Ability Options" button to open the power direction screen.
- Click on the "Alter Plan Settings" option under the power plan that you accept currently selected.
- On the adjacent screen, select the "Modify advanced power settings" options.
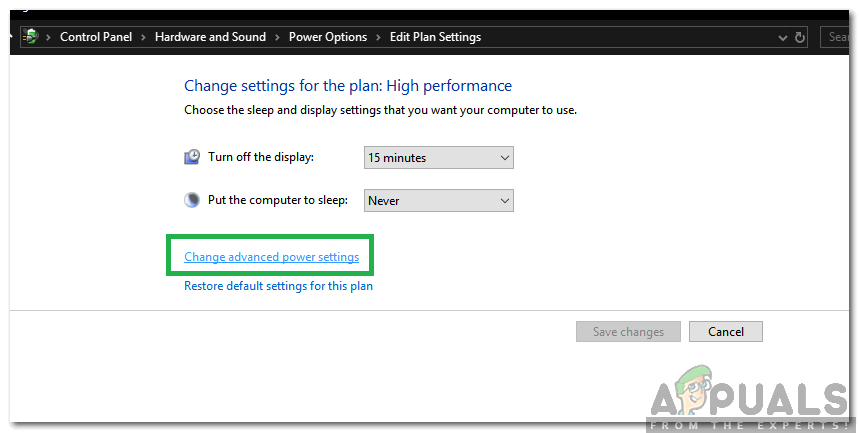
Clicking on the "Modify Avant-garde Power Settings" option - In the advanced power management window, double-click on the "Wireless Adapter Settings" option to expand information technology and then double-click on the "Ability Saving Mode" dropdown.
- Select the "Maximum Performance" option from the list of bachelor options.
- Click on "Apply" to save your changes and and so on "Ok" to exit out of the Window.
- Cheque to see if making this change fixes the issue.
Disable the Virtual Ethernet Devices
If you haven't found a solution all the same and are yet receiving IP Configuration errors then you should endeavour to remove whatsoever virtual Ethernet drivers on your PC every bit these can cause major issues with how your PC connects to the internet. A virtual Ethernet commuter could be anything from a VPN to software designed to improve ping or packet loss. Y'all can notice virtual Ethernet devices and disable them past following the steps beneath.
- Printing "Windows" + "R" to open up the Run prompt.
- In the Run prompt, type in "ncpa.cpl" and press "Enter" to open the network configuration console.
Run this control - In the network configuration, correct-click on whatever entry that seems to belong to software and is non a physical connection that your computer is connected to.
- Select the "Disable" option to disable the virtual network connection.

Disable Network Connection - If yous're unsure, you lot tin can Google the proper noun of each network device to learn more earlier disabling them.
- Check to run across if disabling the Virtual Ethernet Devices fixes the ethernet event.
Reduce Network Ability Usage
The network adapter allows the device to communicate over the local expanse network (LAN), connecting to the internet or other computers. The adapter of course requires power from the PSU to operate and connect to the network finer. Withal, in some cases, if you take set the power output to the maximum value, you might exist getting disconnectivity issues or ethernet errors where yous are unable to properly work with your network adapter. Therefore, to get around these issues, nosotros will be reducing power usage. For that:
- Press "Windows" + "R" to open up the Run prompt, type in "Devmgmt.msc" in the run prompt, and press "Enter" to launch the device director.
Type devmgmt.msc and Press Enter to Open Device Director - Double click on the "Network Adapters" panel to expand information technology and correct-click on the network adapter that your calculator is using.
- Select the "Backdrop" pick to launch the network properties.
- Navigate to the "Advanced" tab.
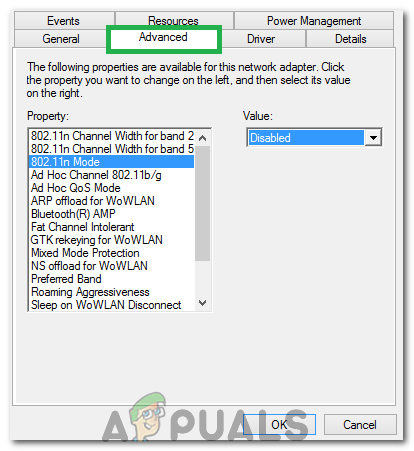
Clicking on the "Advanced" tab and disabling the option - Under Property, locate the "Power Output property" and click on information technology to select it.
- Open the dropdown carte under Value and change it from 100% to 75%. If yous are also going to be using an external monitor while your laptop is docked, change the value to 50% instead of 75%.
- Click on "OK", close the Device Managing director, and restart your computer. Now check whether or not the event has been resolved once your computer boots up.
Enable Ethernet Adapter Through BIOS
By default, the Ethernet adapter should already exist enabled on your estimator. If the Windows operating organization is reporting that your Ethernet is not working then you tin try re-enabling the adapter from within your computer's BIOS.
- Make sure to completely shut down your computer and turn information technology back on afterward a while.
- While the computer is being started, pay close attention to the "Press "This" button to become into the Bios" message that might appear during the startup.
- Press the indicated cardinal apace and repeatedly to enter your computer'south BIOS. Once in the BIOS, you can utilise the arrow keys on your keyboard to navigate through the available options.
- Find "Integrated Peripherals," "Onboard Devices," "On-Chip PCI Devices," or a similar option and press the "Enter" key to access the card. Depending on the type and yr of your BIOS, the exact menu text will vary.
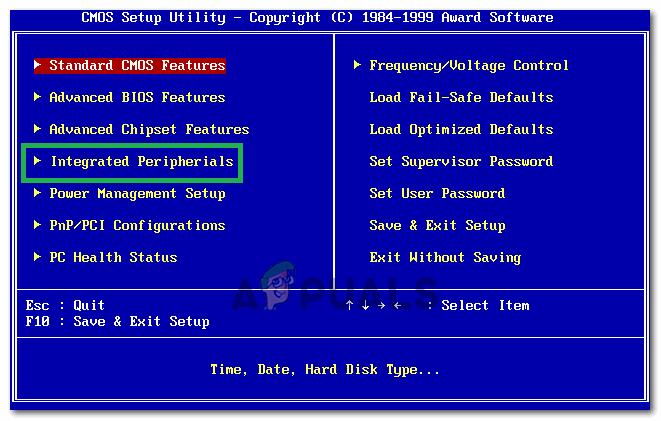
Selecting the Integrated Peripherals option Note: Generally, you should observe something that indicates the settings are related to your onboard integrated peripherals.
- Find and select "Integrated LAN," "Onboard Ethernet," or a similar pick and apply the left and correct arrow keys to cycle through the available options. In most cases, these are either "Enabled" or "Disabled."
- Brand certain to enable the ethernet adapter.
- Press the "F10" keyboard key, this should brandish a dialog asking if you lot would similar to save your settings and exit the BIOS. Printing the "Y" keyboard button to confirm. This causes the estimator to reboot. Windows should now automatically detect your driver and the ethernet should be working commonly now.
- Check to encounter if the issue persists.
Update Network Drivers Using a Third-party software
You can too use third-political party software to update drivers automatically. In this case, we recommend the Snappy Driver Installer (SDI), a powerful free commuter updater tool for Windows that tin can store its unabridged drove of drivers offline. Having offline drivers gives Snappy Driver Installer the ability to take admission to fast driver updates, even if there is no active Net connection on your figurer. Snappy Commuter works with both 32-bit and 64-fleck versions of Windows x, Windows 8, Windows 7, Windows Vista, and also works with Windows XP. Drivers are downloaded through Snappy Driver Installer in "driverpacks", which are merely collections (packs) of drivers for various hardware such as audio devices, video cards, network adapters, etc. It tin can also show duplicate drivers and invalid drivers. It separates the updates that require you to restart your computer so that they are easier to distinguish. You can download Snappy Driver Installer from here.
Ping the Loopback Address
A loopback address is a special IP address, 127.0. 0.ane, reserved by InterNIC for apply in testing network cards. This IP accost corresponds to the software loopback interface of the network card, which does non have hardware associated with information technology, and does not require a physical connectedness to a network. Some users accept highlighted that this issue may arise due to system abuse or malware installed that prevents networking from functioning properly, hence perform the ping operation to verify whether your network carte du jour is working properly or not:
- Press "Windows" + "R" to open the Run prompt.
- Inside the Run prompt, type in "cmd" and so printing "Shift' + "Ctrl" + "Enter" to provide administrative privileges.Run dialog: cmd, then press Ctrl + Shift + Enter
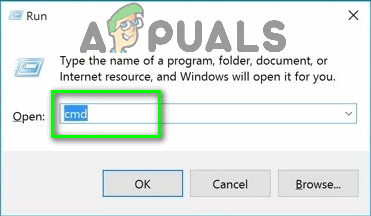
Blazon "cmd" into the Run dialog - Type the command,ping 127.0.0.1. This will send a message to the internal network stack on the motorcar. A response like to the post-obit should occur:
Pinging 127.0.0.one with 32 bytes of information: Respond from 127.0.0.i: bytes=32 fourth dimension<10ms TTL=128 Reply from 127.0.0.1: bytes=32 time<10ms TTL=128 Reply from 127.0.0.1: bytes=32 fourth dimension<10ms TTL=128 Reply from 127.0.0.1: bytes=32 fourth dimension<10ms TTL=128 Ping statistics for 127.0.0.ane: Packets: Sent = 4, Received = iv, Lost = 0 (0% loss), Approximate circular trip times in milliseconds: Minimum = 0ms, Maximum = 0ms, Boilerplate = 0ms
- If the command prompt is successful in pinging the IP Address, it means that networking should be working on your computer and the event most probably lies inside a software misconfiguration and y'all may continue to implement these fixes on your computer.
Run Windows Network Diagnostic Tool
Information technology is possible in some cases, the ethernet adapter might be using imitation configurations to establish a connection with your isp through the ethernet cable. If this is the case, then the error message is displayed while attempting to brand a connection and in this stride, we volition be performing a full diagnostics test of our network adapter so check to come across if performing information technology fixes this result on our computer. For that:
- Press "Windows" + "R" to open up the Run prompt.
- Type in "ncpa.cpl" and press "Enter" to launch the network configuration console.

Opening network settings in Control Panel - In the network configurations, correct-click on the ethernet adapter and select the "Diagnose" selection.
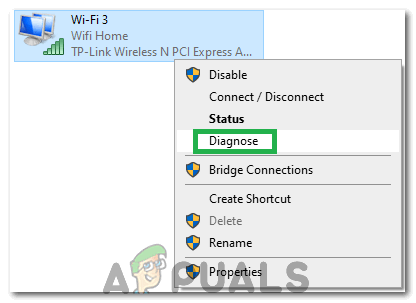
Clicking on the "Diagnose" option - Let the automated diagnosing begin and follow the on-screen instructions to fully diagnose issues with the ethernet connexion.
- Check to meet if running the diagnose window fixes this upshot.
Uninstall Recent Updates
Microsoft is basically known for releasing unfinished updates that oft breaking things on the users' hardware. Therefore, information technology is quite possible that this issue is being triggered due to a faulty update especially if this issue started happening after applying a recent update. Therefore, in this footstep, we will be uninstalling the latest update from our computer so we will bank check to see if doing and then fixes this issue, For that:
- Press the "Windows" + "I" buttons to open the settings.
- In settings, click on the "Update and Security" selection and then select the "Windows Update" push button from the left pane.
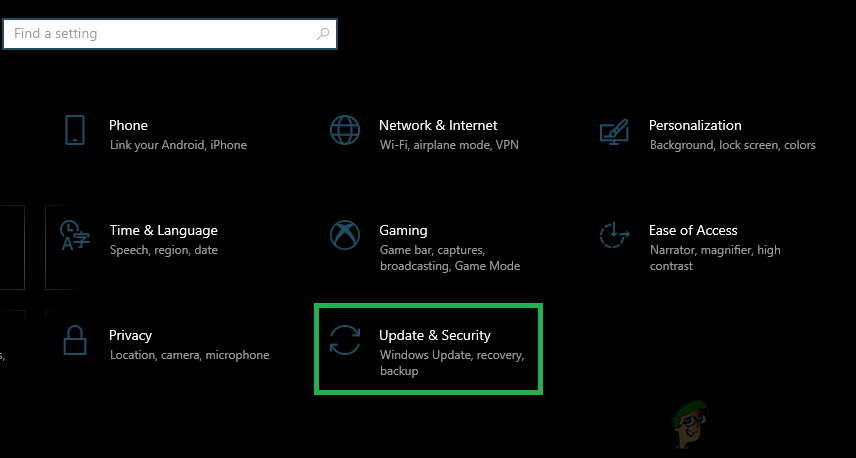
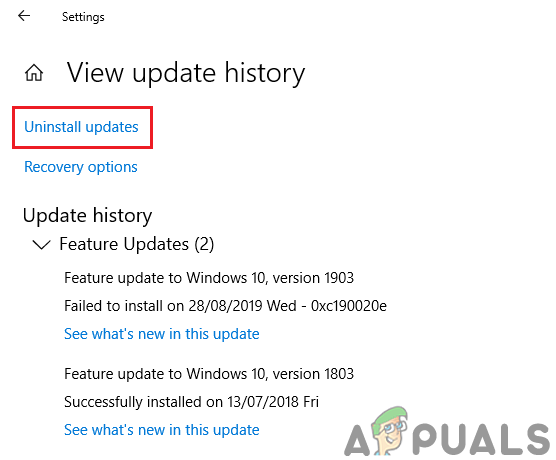
Clicking on the "Update and Security" pick - In the Windows Update, click on the "View Update History" pick.
- In the Updates History, click on the "Uninstall Updates" option and information technology should accept yous to the uninstallation screen where all the recently installed updates volition be listed.
Uninstalling Windows updates from settings. - From the list, right-click on the update that was installed recently and prevented your driver from working properly.
- Right-click on this update and select the "Uninstall" button to remove it completely from the calculator.
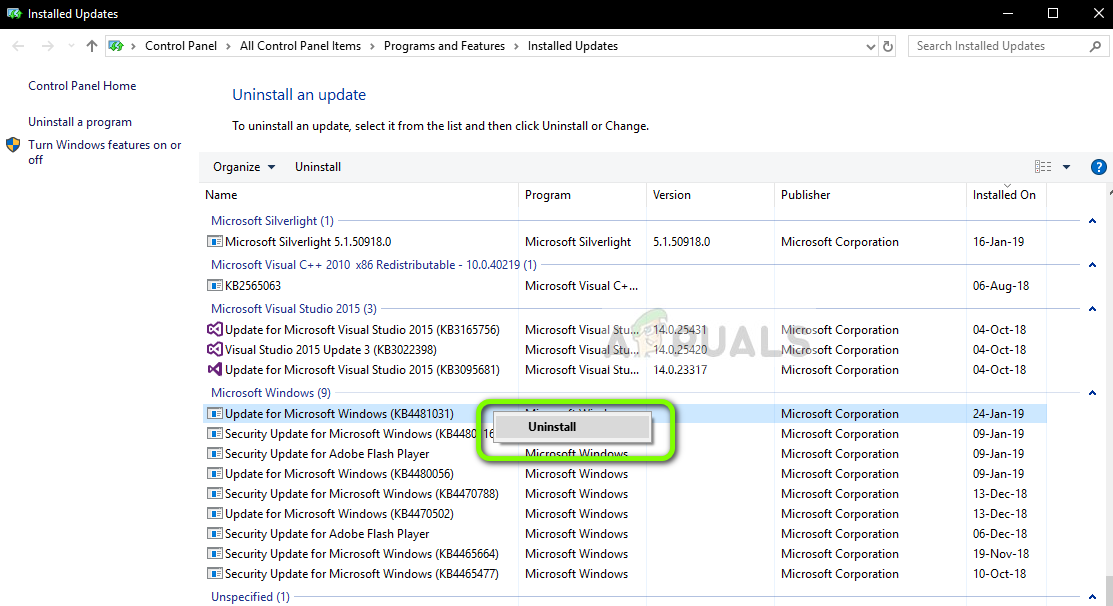
Uninstalling Microsoft Updates - Follow through with the on-screen instructions and cheque to meet if uninstalling fixes this issue.
Once you lot consummate the steps, Windows ten volition roll back to the previous build when there was no Wi-Fi or Ethernet adapter problem. After uninstalling the update, the arrangement shouldn't install the same update until the adjacent quality update becomes bachelor through Windows Update.
Enable QoS Feature
You might be able to solve this problem by enabling the QoS feature. The QoS feature is in charge of limiting your network speed, simply a couple of users reported that the consequence was resolved after enabling QoS on their router. To do this, you need to open your router's configuration page and enable QoS. We have to mention that QoS is an advanced feature, and so it might require some configuration earlier y'all tin can properly use it. It's as well worth noting that this characteristic might not exist available on your router, and so be certain to check your router'due south instruction manual for more data. To enable it:
- Launch your browser and type in your IP address in the address bar.
- To find our IP address, printing "Windows" + " "R" to launch the run prompt. Type in "CMD" and printing "Shift" + "Ctrl" + "Enter" to provide admin permissions. Also, type in "ipconfig/all" in the cmd and printing "Enter". The IP Address that you accept to enter should be listed in front of the "Default Gateway" pick and should look something like "192.xxx.x.x".
Typing in "ipconfig/all" - After entering the IP Address, press "Enter" to open the Router login page.
- Enter your username and password in the respective categories on the router's login page both of which should be written on the dorsum of your router. If they aren't, the default values should exist "Admin" and "admin" for both the countersign and the username.
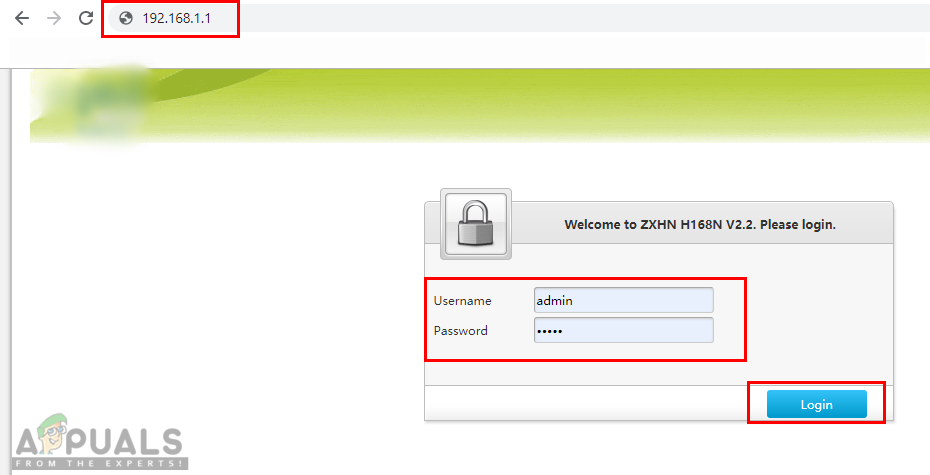
Opening router settings and logging in - Afterward logging in to the router, look to configure the QoS settings as mentioned above and check to see if configuring it fixes this issue.
Workaround:If you have a modem, router, or repeaters in the business firm, find their firmware online, and follow all the provided instructions from the OEM for each device and update their firmware to the newest version. Brand sure to get a stable build, and not a nightly build. Some providers will provide beta firmware that isn't fully functional or may take bugs.
In improver to the above solutions, you can too try:
-
- Log into your router andenable thepowerline. If you lot are using powerlines to extend the connectedness to all of your home, this option must be turned on.
- Make clean your Laptop/Computer and try to plug everything in again.
Enable the Ethernet Autoconfig service
Disabling this service can besides be a culprit, a third-party program might take disabled this service. Ethernet configurations depend upon this service disabling this service can corrupt the network configuration of your adaptor. To enable these services and make sure everything is working fine, follow the steps below:-
- Click on the search bar and type "cmd" then click "Run as ambassador".
- Type the following commands 1 by one:-
sc config dot3svc start= demand
- Restart your calculator then check to run into if the consequence persists.
Employ Net Configuration Control to Reinstall the Drivers
It's besides possible that your network configurations are corrupted and they are not working correctly causing your ethernet to stop working. You can actually use a Command in Commands Prompt to completely Reset the Network Configurations and Reinstall the network drivers. Follow these steps to get your issue resolved:-
- Click on the Search bar and Search for "Control Prompt".
- At present click on "Run equally administrator".
- In one case the Command Prompt window is opened type the post-obit command so printing enter:-
netcfg -d
- Once the control is executed successfully restart your reckoner.
If none of the methods shown to a higher place have helped you with the issue you are having information technology's also possible that the root cause of this issue is either your router or the Internet Service Provider (Isp). You can reset your router/modem past following this guide (hither). This result can be from the router's DHCP it might be having a trouble assigning an IP address to your estimator so resetting your router can potentially fix the issue. If that doesn't work for yous either yous volition have to contact your Internet service provider to go this issue resolved.
warrenbroolivies00.blogspot.com
Source: https://appuals.com/ethernet-doesnt-have-a-valid-ip-configuration/
0 Response to "Invalid Ip Address Please Enter It Again Netgear"
Post a Comment